Wednesday, 30 September 2020

Crostata Di Mele....& Apple Turnovers


Crostata Di Mele
https://youtu.be/r7kFbuLpsF0


It’s apple  picking season!! I love sour apples. I grew up across the street from an apple orchard and would spend all my time there picking and eating apples. I continue to pick apples every September and my favourite are Macintosh, yes, even for baking. I let them sit for a week or two in my cold cellar while they sweeten up a little. The tartness of the apple will determine how much sugar I add to this recipe.

This is so quick and easy, you too can make this rustic Italian style apple Crostata. I purchased Tenderflake puff pastry which also happens to be egg and dairy free. (Check the ingredients).The results were fantastic.

You will need:

6 large apples, washed, peeled and sliced thinly for quick cooking

2 tbsps flour

3 tbsps brown sugar - I don’t like them too sweet.  Taste the apples and add more brown sugar if you need to

1 tsp cinnamon

1 package of Tenderflake Puff Pastry or two sheets

Thaw out your puff pastry and roll the first one out to 12 x 12in. square. This will be for the Apple turnovers. Then cut into 6 even squares. Fill the centre with as much apple that you can as the apple will shrink once cooked. Fold over and crimp the edges closed with a fork. Then cut 2 to 3 air pockets on the top. Brush with a little water and sprinkle turbinado sugar, or raw cane sugar, over the top.

Roll out the second piece and put the remaining apples in to the centre. Bring up the edges toward the centre leaving the centre apples exposed. Brush with water and sprinkle turbinado sugar on top.

Preheat oven to 400 F and bake for 20 to 25 minutes until slightly golden.



Tuesday, 22 September 2020

Butternut Squash Soup with Truffle Oil


Butternut Squash Soup with Truffle Oil
https://youtu.be/socJpZQG924


How to Make Homemade Vegetable Broth
https://youtu.be/AJz-wu40v1E

How to make easy Chicken Broth - Brodo Di Nonna
https://youtu.be/agH3VD-XLQI


So lucky to have been able to grow this beautiful little guy in my organic vegetable garden. I had tried for several years but was unsuccessful. Since this is squash season, I thought I would make a delicious, smooth and creamy Butternut Squash Soup with a little something extra....truffle oil. The creamy texture does not come from cream as this recipe is totally dairy free and vegan. I use a vegetable broth but you can certainly use chicken if that’s your preference. 


If you have ever used truffle oil, you will know that a little goes a long way. I like to drizzle it on thick, creamy soups for a that little bit of extra flavour. And let me tell you, truffle oil has a huge flavour in just a few little drops.

For this recipe you will need:

1 squash, cubed ( mine is small however you can adjust ingredients based on the size of your squash)

1 small onion - cut into quarters

1 large garlic clove cut in half

2 tbsps olive oil

1 sprig if fresh sage, if desired

2 - 3 cups of vegetable broth, or more depending on size of your squash. You can also use chicken broth, if you prefer

Salt and pepper to taste

Drizzle of truffle oil,  “ Tartufo Bianco”

Roasting the squash in the oven gives the soup an extra layer of flavour. So I begin by cutting my squash into one inch cubes. Since my squash is little, I have about 3 cups of squash. This should be enough to make about 4 servings of soup. 

Lay the squash, onion and garlic on a roasting pan. I like to cover my pans with parchment paper to prevent sticking and for easier cleanup.

Drizzle your vegetables with olive oil, I like to use extra virgin, salt and pepper. Toss to ensure all are well coated with oil.

Bake in a 375 F oven for at least half an hour, or until fork tender.

Put all into a blender and add 2 cups of broth. Now this is where you need to be the judge of how much liquid you want to add. Butternut squashes come in all different sizes so your liquid will need to be adjusted accordingly. My little squash needed 2 cups of broth to give me my desired thickness. I don’t like it too thick. Needs to be creamy and smooth. So I stop to check before adding more liquid. 

Now just for a little extra boost of flavour, I picked a small sprig of Sage from my garden. I think it goes well with Butternut squash and anything that has to do with the Fall season. I let it sit in my hot broth for 2 - 3 minutes and let the flavour infuse into my broth. You can skip this step if you don’t like Sage.

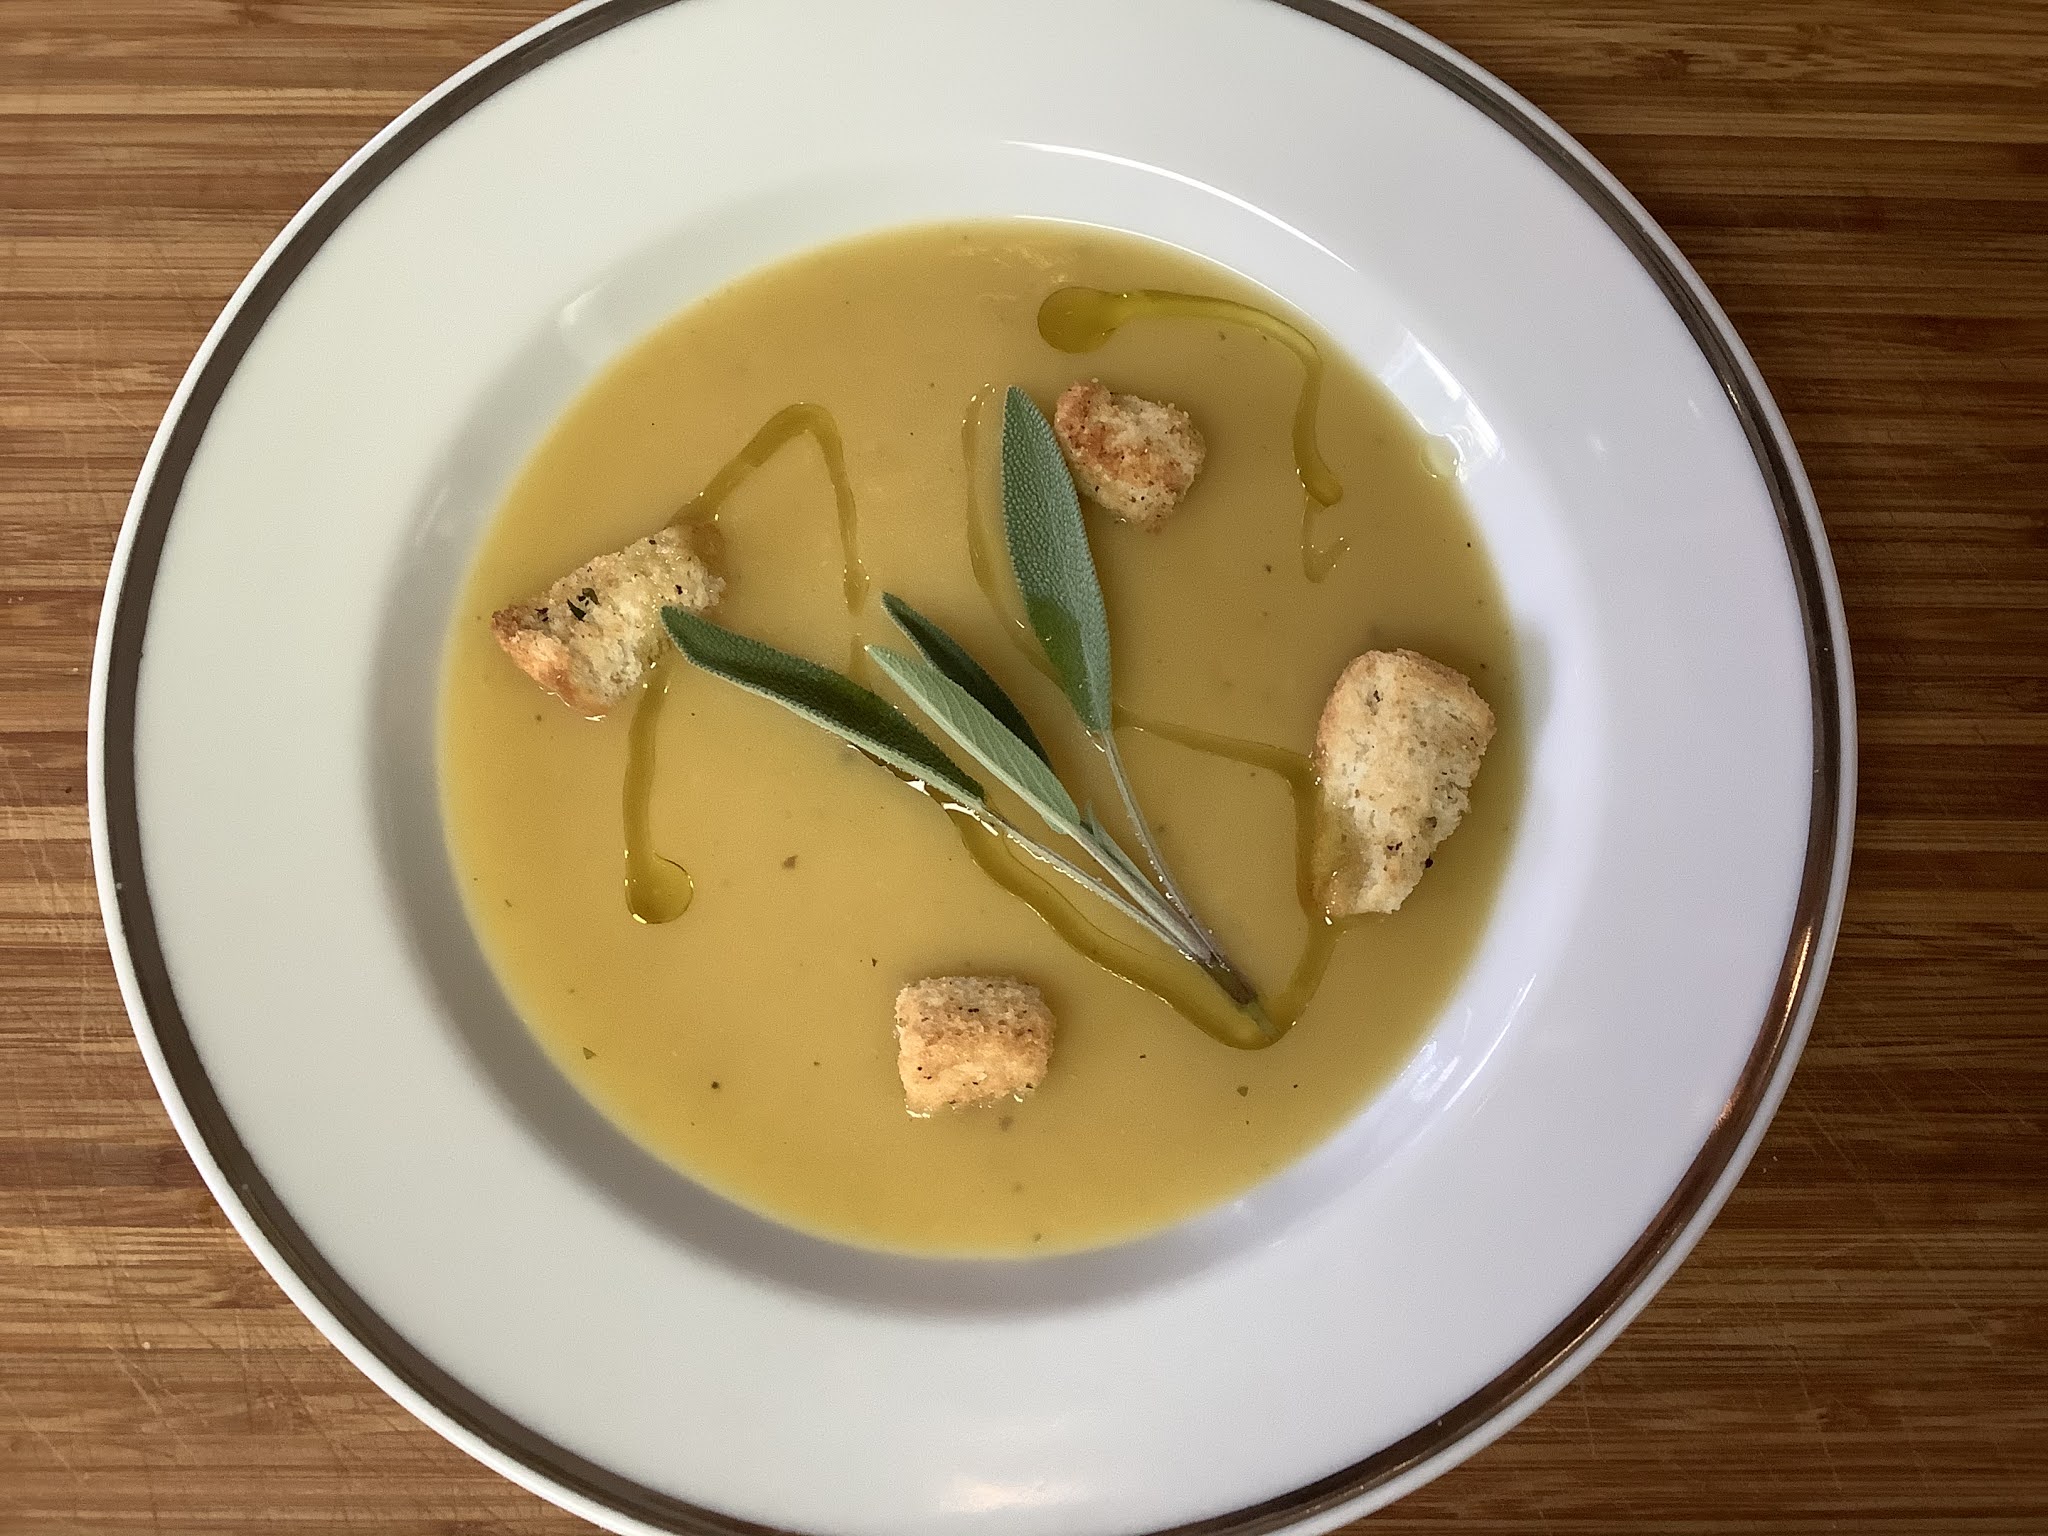
Plate your soup, add a drizzle of truffle oil, top with breadcrumbs and a sprig of Sage.  Beautiful, comforting and definitely warms the soul.


Friday, 18 September 2020

Chick Pea Salad with Roasted Red Peppers


Looking for ways to use those roasted red peppers of yours? If you would like to roast your own but not sure how, check out video link below.

How to Roast Red Peppers
https://youtu.be/8WdP5CqfAbQ


This salad is not only gorgeous to look at but it is quick, simple and absolutely delicious!!

Oh, and did I say very healthy?!

Ingredients:

1.5 cups canned chick peas (enough for 2 - 3 servings)

2 - 3 tbsps extra virgin olive oil

1.5 tbsps balsamic vinegar ( or more if you like vinegar)

2 tbsps chopped parsley

2 tbsps of slivered roasted red peppers, cut in half

1 tsp chopped sundried tomatoes

1/2 small garlic, minced

A few little slices of hot peppers or dried peperoncini....if desired

Salt and pepper to taste

Put all ingredients into bowl and toss!! 

That’s it. Season to your taste.

Once you taste this, you will want to eat it all at one sitting.

Tuesday, 15 September 2020

Wild Blueberry Freezer Jam

 Wild Blueberry Freezer Jam - No cooking and no sterilization needed!


You will need:

4 cups of crushed wild blueberries, skins on ( 3 pkgs x 340 grams each = 1020 grams) have about 1/2 cup more fruit set aside just in case you are short)

1-49 gram pkg of Certo Light, pectin

1/4 cup granulated sugar ( to add to your Certo crystals)

1 Tbsp lemon juice

3 cups granulated sugar

6 - 7 jam jars, washed thoroughly 

Grandma Mary used to make this freezer jam recipe at least 60 years ago. She would make strawberry jam using Certo, pectin in a package. We continue to use the same recipe and because it goes straight into the freezer, the fruit maintains its delicious fresh flavour and gorgeous colour. We follow the same recipe during strawberry and peach season.

This recipe is so quick and easy. No cooking required, no sterilizing of jars and half the sugar! You can’t beat that!


It’s wild blueberry season in Canada and I was able to find them in my local grocery store. I bought 3 containers of 340 grams each and once all my fruit was crushed, I was short by a quarter cup of fruit. The thing with this recipe is that the amounts have to be accurate or it won’t work. Don’t skimp on fruit or sugar content. So I had to buy more blueberries and add to it.

Grandma Mary used Certo in her jam. Certo is pectin which helps jam solidify and can be found in all grocery stores. Now we buy Certo Light which needs half the sugar. One box of Certo Light, 49 grams, is enough for one batch of jam...or 6 to 7 filled jam jars.


Add 1/4 cup granulated sugar to one box of Certo Light, mix and set aside.

Begin by washing your fruit, removing stems and discarding any fruit that is bruised. The freshest fruit makes the best tasting jam.

In a large bowl, using a potato masher, begin mashing the blueberries, skin and all, a small batch at a time.  You will need 4 cups of  mashed fruit. I like to see actual blueberries in my jam, so it doesn’t get mashed too much.


To your fruit, stir in one tbsp lemon juice.

Add your Certo Light and sugar mixture to-your mashed blueberries. Stir until all is incorporated. Let the mixture sit for half an hour stirring once in awhile. Put your timer on!

When the half hour is up, stir in 3 cups of granulated sugar and stir consistently  for 3 minutes. Remember, don’t skimp on sugar. It’s already half the amount you would use in regular jam.


Once stirred for 3 minutes, it’s time to fill your clean jars. They don’t need to be sterilized, however, they need to be clean. So I wash them prior to use, either with soap and water, or in the dishwasher.


Fill the jars leaving a 1/4 gap at the top of jar. Screw lids on very loosely and let the jam set overnight. I leave them on the counter. 

Once jam is set, tighten the lids. Put one in fridge for immediate use and the rest can go in the freezer. Will keep for 8 months in the freezer...if you don’t eat it all before that time😋


Sunday, 13 September 2020

Roasted Red Peppers


How to Roast Red Peppers


https://youtu.be/8WdP5CqfAbQ


Roasting red peppers by the bushel is something that I remember my family doing ever since I was a young child. I still continue to do it today. I roast them on the gas BBQ then freeze them. I pull them out as an appetizer, I use them in recipes and I love to eat them for lunch on a slice of Italian bread.😋

You can buy just a few of them if you would like to try them. Usually Shepherd peppers are used.  


I begin by giving them a quick wash then they are placed on a very hot grill over high heat for 30 minutes or so or until they get nice and soft and somewhat blackened. Turn often.


I place them in a dish then cover with plastic wrap and let them sit until they cool and you are able to handle them. The plastic wrap makes it easier to peel them.

Pull off stem and peel the skin off the pepper. Open the pepper up and remove as many of the seeds as you can. Not a big deal if leave some.

Pull the pepper apart into thin strips. This is how I prefer to eat them, but you can leave them in bigger pieces if you like.

I like to then freeze them in small portions, in small plastic containers, enough to eat as an appetizer when we have guests over.  This way I don’t have to thaw out a large amount. You can also freeze them in small freezer bags.


Roasted Red Pepper Appetizer

3/4 of a cup of roasted red peppers, cut into thin slivers

1.5 tbsps extra virgin olive oil

2 tbsps fresh parsley, roughly chopped

Half a small garlic clove, minced

1/4 tsp salt

Pepper to taste

Mix together and serve on a slice of fresh Italian Bread, on bruschetta, or on a slice of fresh ricotta cheese.


Saturday, 12 September 2020

Roasted Butternut Squash


Roasted Butternut Squash

https://youtu.be/nOMya9E_Su8


This has to be my favourite squash. I was so excited when my sister gave me some of her non- GMO seeds to plant in my garden.  She has a huge garden where she focuses on heirloom, non GMO organic gardening. For gardening tips, check out her Instagram posts rita_di_gardens.

I want to be able to taste the delicious squash so I am keeping this simple. Peel it, slice it and roast it!

You can watch my IGTV instagram video to see how I peel and slice the squash. Can be tricky due to the super hard skin.

I use a potato peeler to remove skin, then I cut the ends off. I cut squash in half, horizontally, so it’s easier to manage.

Cut in half vertically and scoop out seeds.

I then cut half inch slices and place on cookie sheet covered with parchment paper.

Drizzle squash slices with good olive oil, sprinkle with salt and pepper and make sure they are all well coated.

Bake at 375 F for half an hour or until fully cooked and fork tender.

If desired, pull out 10 minutes early and sprinkle squash with brown sugar. Mmmmmmmmh Tastes like candy!


Tuesday, 8 September 2020

Grandma Mary’s Peach Pie


Grandma Mary’s Peach Pie


This has to be one of my favourite pies. The fresh Ontario peaches, when in season, are absolutely “peachy”😉.just make sure they are total ripe before you use them. I let them sit on the kitchen counter for a couple of days until they are ripe.

This recipe is totally egg free and dairy free. I discovered that Pillsbury pie crust does not have any egg or dairy in it. So that’s the one I go with. The filling is also egg free and dairy free. I use knobs of vegan margarine to top the pie before the crust goes on.

If you don’t have any allergies, good for you. Use any pie crust or margarine/butter that you like.

You will need 10 to 12 medium to large ripe peaches for this pie, or more. I like my pies heaping with fresh fruit.

Peel the peaches and then slice them into nice thin slices. Place them all into a large bowl.

Stir in:

3 tbsps fresh lemon juice

3/4 cup granulated sugar

4 tbsps flour

1/8 tsp cinnamon 

Pinch of salt

Place bottom crust onto pie dish and pour in the peach filling. Place  5 small knobs  of margarine on the top of your peach filling and cover with the top crust.

Make 4 air holes with a knife and place in a preheated 400 F oven for 40 minutes or until crust is beautifully golden.


I covered the edge of my crust with foil once it begins to colour to prevent it from burning. The pie may begin to leak onto the bottom of your oven so I have a piece of foil ready to place underneath the pie dish.

Let  cool completely before cutting to prevent the peaches and juices from running out of the  pie.


Delicious topped with vanilla ice cream!


Monday, 31 August 2020

Peaches, Cookies & Cream Cake

 Peaches, Cookies & Cream Cake


Peaches, Cookies & Cream Cake
https://youtu.be/sNGeGWGXOWE


Nothing better than incorporating fresh Ontario peaches into your desserts!

This is a moist cake with a heavier texture that lends itself wonderfully to the inclusion of cookies and fresh fruit.

It’s dairy free as there is no butter or milk in this recipe, however it does contain eggs.

Begin by sifting together:

1-3/4 cup all purpose flour

1-1/2 tsp baking powder

1/4 tsp salt

Set aside

Measure out 1 cup vegetable oil (I used a combination of canola and olive oil)

Add 1 tsp of almond extract to your olive oil and set aside

Prepare the fruit and cookies that you will add to your batter:

You will need 3 peaches peeled and cut into chunks and 1 cup amaretti cookies, (they contain egg whites but no milk or butter) broken into pieces

Now for the batter: 

In an electric mixer, beat 4 eggs along with 3/4 cups sugar until it thickens and becomes pale in colour, about 3 minutes.

To your batter add the flour and oil mixtures, a bit at a time and alternating between the two, starting and finishing with the flour.

Stir in the peaches and amaretti cookies.

Pour batter into an oiled and floured 8 inch spring form pan.

Cook in a preheated 350 oven for 45 to 50 minutes until cake moves away from sides and lightly browned.

This cake is nice and thick using an 8 inch pan, however, I have made it before in a 9 inch pan, cooking it 10 minutes less in oven. Still looks very nice.

Remove from oven and let cool on wire rack. Do not remove from pan until fully cooled.

This is where you can be creative and decorate as you wish. I added sliced peaches to the top,  whipping cream and an extra cookie for good luck😋

You can substitute the whipping cream for dairy free whipped coconut cream, just as delicious!


Tuesday, 18 August 2020

Focaccia -Two Ways


Focaccia 


Focaccia- Two Ways
https://youtu.be/UJcj1GlWOHE


You don’t need to make your own dough for this recipe, but I prefer my own to store bought pizza dough. 

Focaccia is thick and crunchy and I use my pizza dough recipe to make it. You can find my pizza dough recipe by following the link below. This recipe makes two 12 x 17sheet pans focaccias.

How to Make the Best Pizza Dough
https://youtu.be/mC3SmzgyfO0

Whether you make your own or buy it they both need to rise a second time in the baking pan. That’s what makes it thick. It takes about 30 minutes for this second rising.

Dimple it with your fingers and it’s ready to top with your ingredients. 

For the tomato one, I need two garden tomatoes to fill a 12 x 17 sheet pan. I begin by covering the dough with mozzarella cheese, vegan or regular. Top cheese with sliced tomatoes. Top tomatoes with more cheese. Drizzle with your best olive oil. I use extra virgin olive oil. And top with salt and pepper if you like.

Bake in 425 oven for 25 minutes or until bottom crust is nicely golden.
When tomato pizza is out of oven,  top it with a chiffonade of fresh basil. Refer to my video to learn how to chiffonade. (Cutting your fresh basil into strips).

For the Rosemary focaccia, dimple the dough with your fingers and evenly drizzle olive oil over the top of dough. Top with chopped Rosemary, as much as you like. I love Rosemary, so I put lots. Salt liberally and put into oven, same as above.

Focaccia is versatile. You can make sandwiches with it. Stuff with prosciutto or capicollo and you have a delicious lunch😋.


Wednesday, 12 August 2020

Italian Flat String Bean Salad


Italian Flat String Bean Salad

https://youtu.be/eGqtDYFIs04
My family has been growing these non GMO beans for years.They beans grow very long and flat.
They are used in a variety of dishes,  but freshly picked and eaten in a simple salad dressed with olive oil and vinegar is my favourite way of eating them.

I picked about 2 handfuls of beans, washed them,cut off the stems and cut them into bite size pieces. I gave them a quick boil, for about 4 to 5 minutes until fork tender. I then drain and rinse them in cold water to cool them down although this salad can be eaten warm. Do not salt your water when you cook your beans as it will take away from the vivid green colour.

To the cooked green beans add one chopped green onion, 2-  3 Tbsps chopped parsley and 1 Tbsp chopped mint. The mint adds a really nice flavour but you can leave it out if you are not a fan.

The dressing is very simple: 2 tbsps extra virgin olive oil, 1 Tbsp Wine vinegar, 1/2 tsp salt.

Stir well and it’s ready to enjoy. So fresh and healthy. Great as a side dish or it can be your lunch!!

Saturday, 8 August 2020

Italian Olive Oil Cake

Italian Olive Oil Cake (Dairy Free)


Italian Olive Oil Cake
https://youtu.be/23ClsOkqzo4


This cake is so quick and easy, that you can whip it up in no time using simple ingredients that can be found in your pantry. You would think that a cake made with olive oil is heavy and soaked with oil but this cake is surprisingly light, delicate and delicious. It’s so versatile that you can choose whatever fruit is in season and serve it alongside it. 

This cake is dairy free as you can substitute the milk for any nut milk such as almond, cashew or even soy.

However, it does have 4 eggs so anyone with an egg allergy should not have this cake. You will need:

1 3/4 unbleached all purpose flour

1 1/2 tsps baking powder

1/4 tsp salt

Begin by sifting together all the dry ingredients listed above and set aside.

1 cup olive oil

3 tbsps milk ( cashew, almond, soy or regular milk)

Whisk oil and milk together and set aside.

4 whole eggs

3/4 cups granulated sugar

Zest of one lemon

With an electric mixer, whisk together eggs and sugar for 3 minutes until it thickens and becomes lighter in colour.

With mixer on low, gradually add some flour to egg mixture. Mix a little then add some of the oil mixture. Alternate the two until finished, ending with flour. Mix in the zest of one lemon.

Pour into  9 inch spring form pan prepared with olive oil and then sprinkled with flour.

Put into a preheated 350 F oven and cook for 30 to 35 minutes until golden and it has pulled away from the sides. Let cool in pan on a cooling rack.

So easy and delicious. Don’t forget to sprinkle with icing sugar. You will totally impress your friends!!


Tuesday, 28 July 2020

Eggs Poached in a Tomato Sauce - Poached Eggs in Purgatory


Eggs Poached in Tomato Sauce


Eggs Poached in Tomato Sauce - Poached Eggs in Purgatory 
https://youtu.be/ycVSAcnPzSA


So easy and quick on those nights where it’s too hot to be over a hot stove for too long.
Eggs are so versatile and can be eaten for breakfast, lunch or dinner .
This egg dish can be eaten for lunch or dinner.
I am poaching two eggs in this recipe so I will make enough enough sauce for two.
This recipe can easily be modified for more people.
I use one cup of crushed tomatoes, a few slices of onion, dried oregano and basil, salt and pepper.
Basically that’s it. 
Heat up a drizzle or two of your best olive oil, give your onion a little fry and add your sauce.
Add your seasonings and let cook down until reduced and thickened. Should only take about 15 minutes.
Add your whole eggs one at a time. Cover and let com for 3 minutes for a soft yolk.
Eat with bread!
Yum!

Saturday, 18 July 2020

How to Make Quick and Easy Pesto - Vegan options


I picked basil and parsley from my garden. Doesn’t get any fresher. The smell is incredible.
You will need about 3 loose cups of basil and one loose cup of parsley. Wash and remove leaves from stem and pat dry. I made  the mistake once of forgetting to remove stems and threw everything in the blender.  It was awful. I will never make that mistake again. 
Put them both in food processor and give it a couple of pulses to chop it.
Then you can add all your other ingredients in at once and continue to chop at medium to high speed until you are happy with the consistency. I like to see the pieces of basil and parsley in mine so I don’t process for too long. If you don’t have a food processor you can use a blender. You can also chop by hand.

Half a coarsely chopped onion
A quarter of a clove of finely minced garlic....a little raw garlic goes a long way.
2 pieces of sundried tomatoes, roughly chopped 
A handful of pine nuts
Juice of half a lemon
Half a tsp salt or to taste
Pinch of pepper 
5 to 6 Tbsps olive oil or more until you are happy with consistency 
One to two tbsp balsamic vinegar
A couple of tbsps of grated vegan Romano style cheese. It is also delicious without any cheese as well.

And if you don’t have dairy allergies, throw in a couple of tbsps of Parmesan or Romano cheese. You can also add cream to your pesto for a creamy consistency.
Delicious on many types of pasta including potato gnocchi, rotini and any gluten free pasta of your choice.
Mmmmmmmh, smells like the garden!

How to Make Easy Potato Gnocchi (Vegan)
https://youtu.be/2JP7HtJFbLY